
My sons’ cakes are different from other kids’ cakes. We have multiple food allergies in the house (me to tree nut, Kal to peanut, and Zax to egg and peanut.) So we have to use special ingredients or recipes to keep everybody safe. Which also makes cake decorating more interesting.
I did this recently–it’s hard for me to believe, but my youngest baby just turned four. Four!!! He’s not such a little boy anymore! Superheroes are big around here, as you’ve probably guessed, and so Kal wanted a Batman birthday party this year. We bought Batman favors and played Batman games, and I also made a Batman cake.
Until my kids were born, I wasn’t very creative with cakes. I made the occasional layer cake, but mostly I just baked cakes in a 9×13 pan, left them in there, and slathered a thick layer of frosting on the top. However, when Zax turned one, that just didn’t seem like enough. I wanted to make a special cake that reflected his birthday celebration–and I never looked back.
As the years have gone by, my cakes have gotten increasingly intricate and detailed. It’s a masochistic hobby, or so I tend to call it. I’m usually up until 3:00am the night before the party, cake decorating. Egg-free cakes fall apart so easily that they require a lot of special handling. But I enjoy doing it. It’s time that I spend listening to showtunes and making special memories for my kids. Plus, it’s totally worth it to see their faces light up when they see their special cakes.
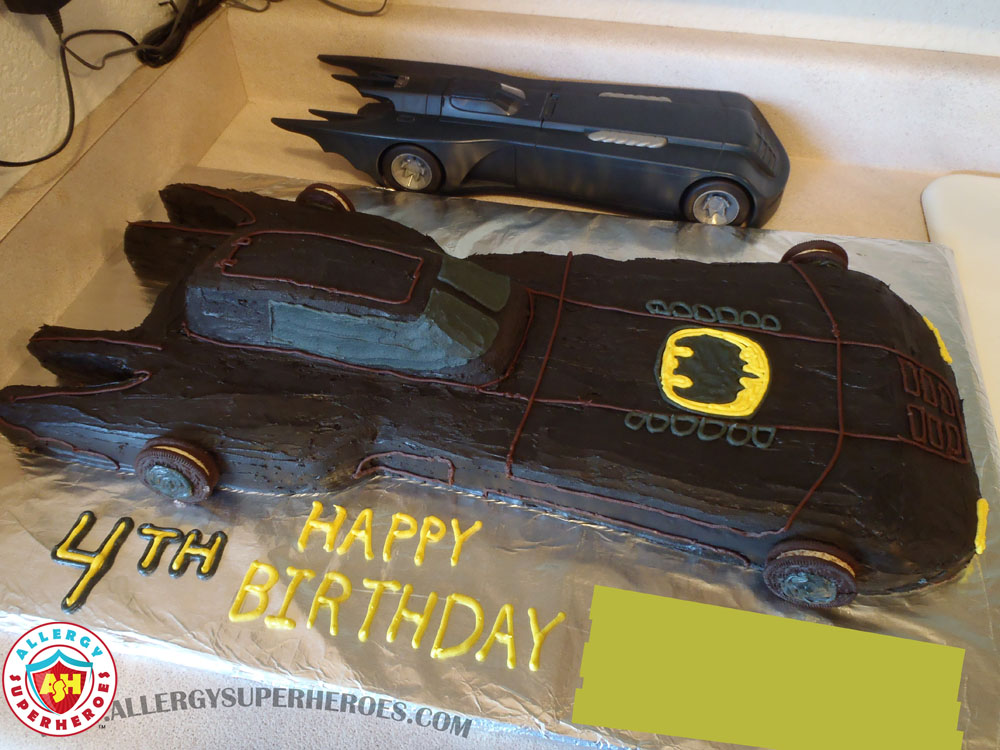
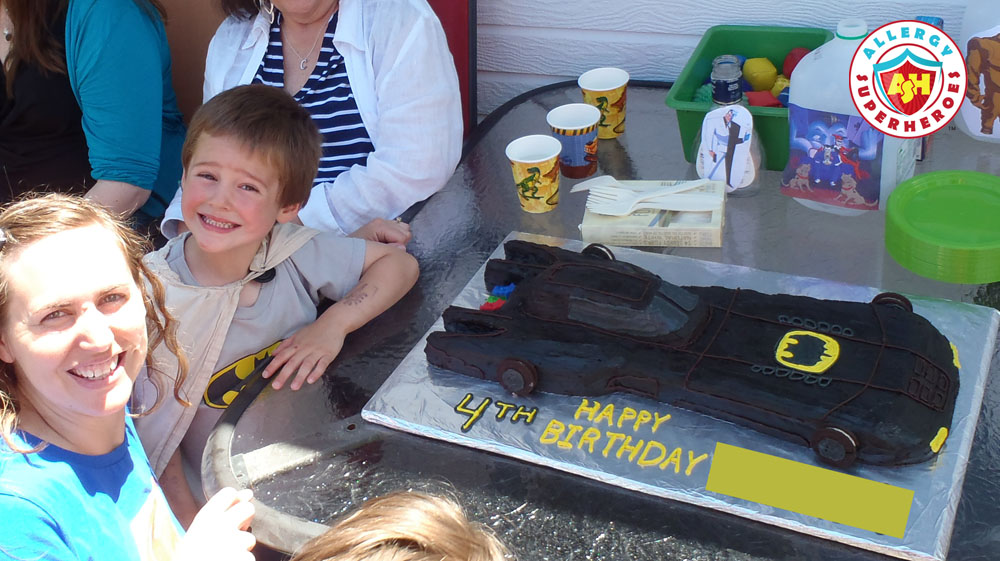
This was Kal’s Batmobile cake for his 4th birthday party.
After posting this picture on Instagram, I had several people ask me to do a tutorial on cake decorating. So that’s what I’m doing today! I will walk you through how to make a Batmobile cake, but the principles can be applied to any shapes you wish–within reason. (It’s only cake, after all!) Please bear in mind that I have had no official training in cake decorating. I just have online instructions, YouTube videos, and a lot of creative sculpting–but I have learned some pretty good tricks!
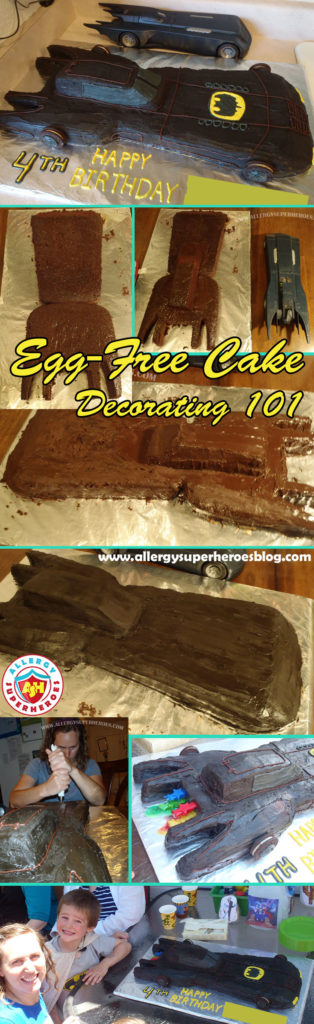
Cake Decorating 101: How to make a Batmobile Cake
Start with your favorite cake
First, of course, you have to bake your cake(s), and you want to make sure they stay together until you’re ready to cut them. Line your baking pans with parchment paper that you’ve cut to the size of your pan. This will enable you to get the cake out of the pan without sticking or, hopefully, breaking. If you’re doing this egg-free (or anything-free) it will probably behave differently than a normal cake, but do your best.
Preferably, you want a cake that can hold it’s form. Wacky cakes are good for sculpting (and yield decent results, even with gluten free flour.) They come out very dense and moist, which helps them hold together–but use whatever cake you’re most comfortable with.
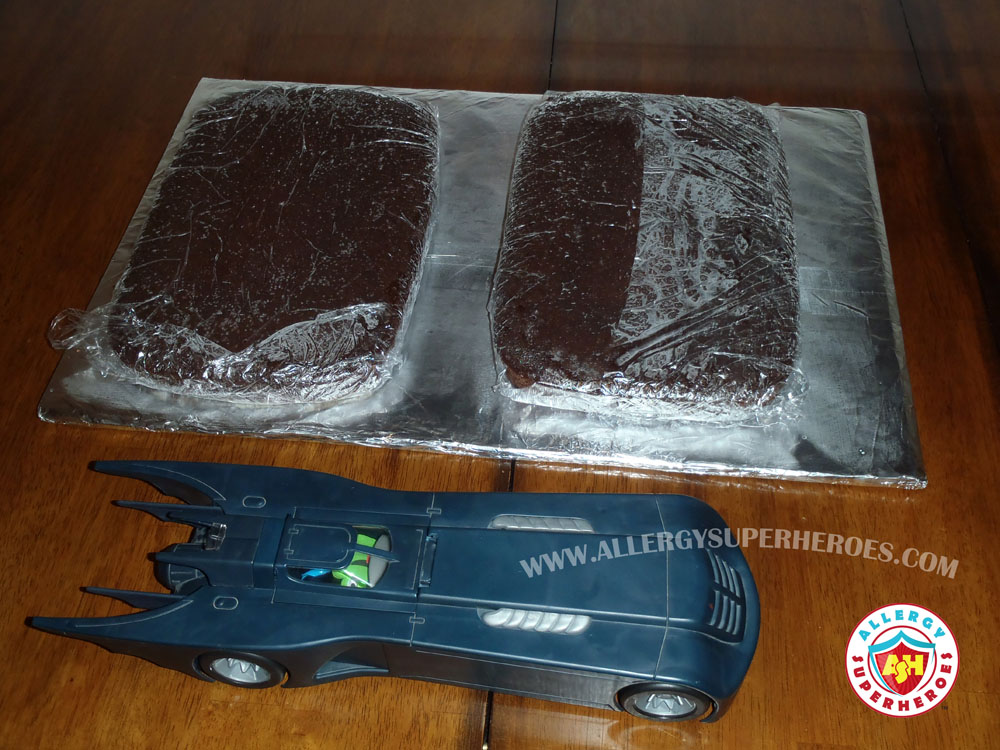
Allow your cake to cool completely, then wrap it in plastic wrap and place it in the freezer. Repeat until you have all the cake you’ll need. (If you don’t let it cool first, you’ll end up with a moist, gummy layer sticking to the plastic wrap. Trust me, I’ve made this mistake.)
For the Batmobile cake, I made two 9×13 sheet cakes. I use a Pampered Chef stoneware pan.
Choose your Frosting
You’ll also, obviously, need frosting for cake decorating. You can use store-bought frosting if you like (and if it’s safe for your family.) I’m a frosting snob though, and I make my own.
You can make your own frosting in advance, but you will want it to be easy to spread at decorating time. If it’s the type that hardens up in the fridge like my Cream Cheese Frosting, you either need to make it fresh or allow it to sit at room temperature for an hour or two before decorating. If it’s the sort that hardens up even at room temperature like my Chocolate Buttercream Frosting, it’s preferable to make it fresh, but you can heat it up in the microwave if you want to make it beforehand.
You’ll need a surface for your cake to sit on as well. I’ve used large platters, but eventually I took several layers of large, hardy cardboard and taped it all together. I completely coated it in packing tape (so the moisture wouldn’t seep through into the cardboard) and I use this as my cake plate most of the time. I wrap it in foil before every cake because it provides a nicer-looking surface.
Once your cake is frozen and your kids are out of the way, it’s time to begin!
Create your Shape
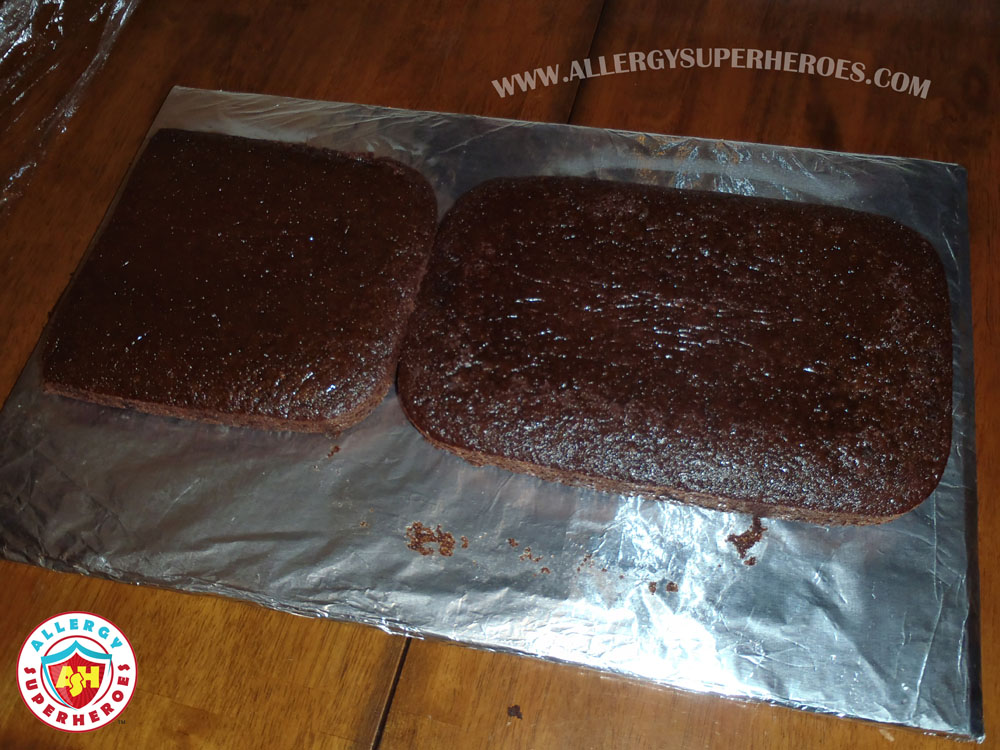
Unwrap your cakes and carefully place them in the orientation your first layer will need. Do your best to line them up correctly before you put them down, because they will be difficult to move after they’ve touched a surface.
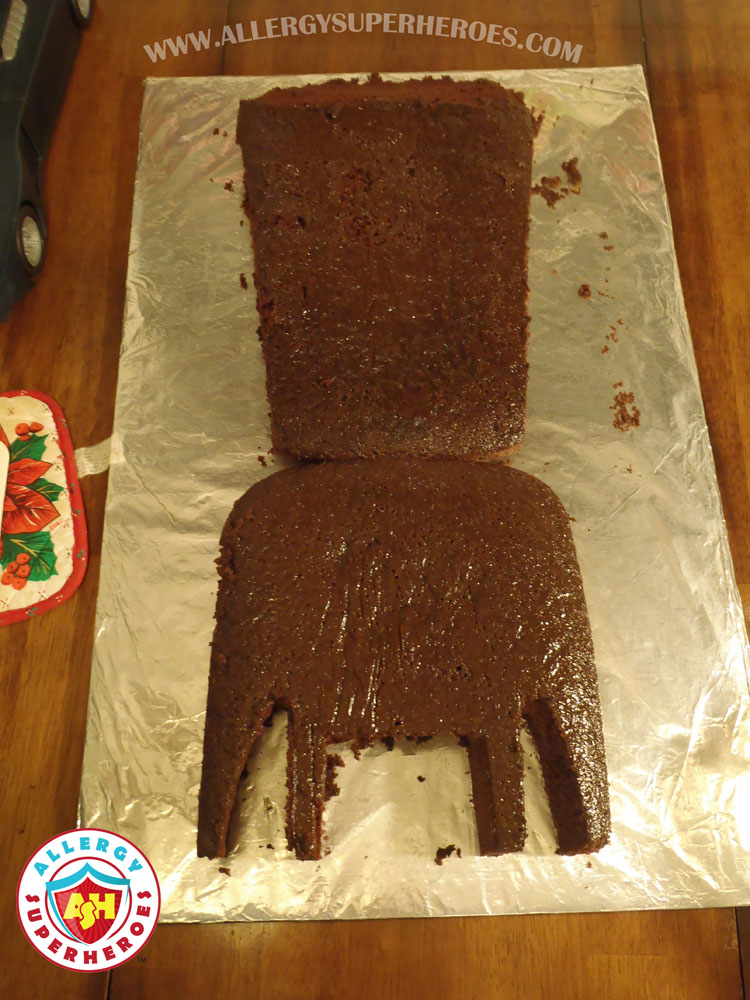
Using a serrated knife, saw your cakes into large blocks that will be the groundwork for your cake. It’s important for the cake to be frozen when you do this. You can cut straight, even edges on frozen cakes. Soft cakes will crumble. For the Batmobile, I used one whole cake and just over half of the second, all lined up straight.
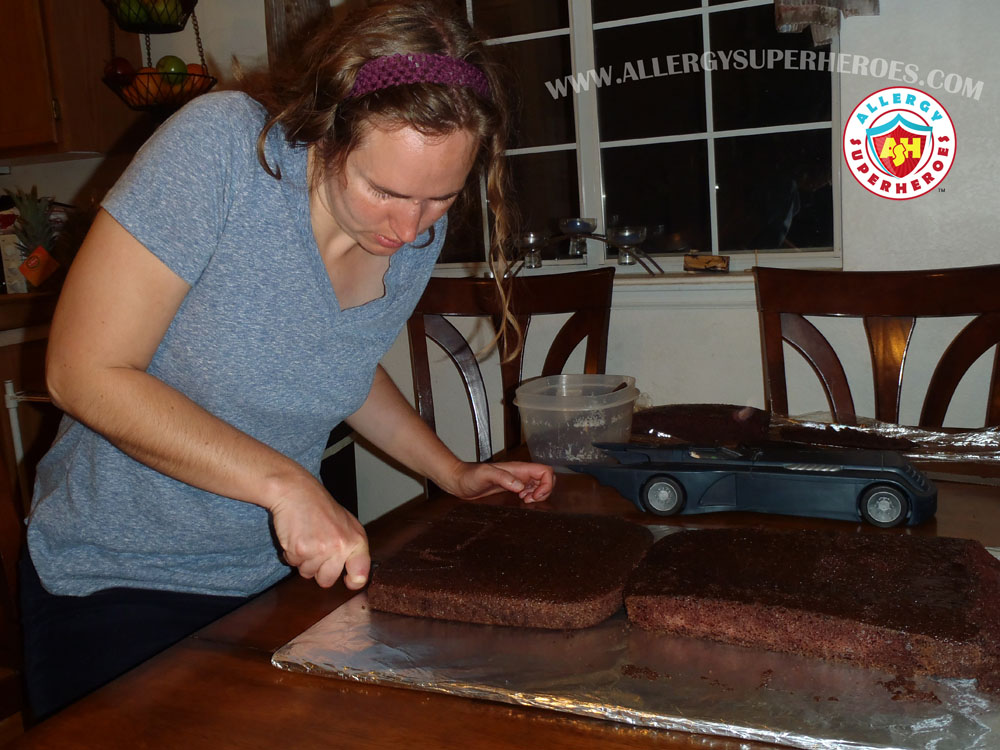
While the cake is still frozen, cut details into your first layer. I shaved the sides of the full cake to approximate the Batmobile’s sleek body shape, and then cut wing-like edges at the back. I took advantage of the curved corners of my cake pan to match some of the contours of the Batmobile. Starting about two inches in, I also cut the front end of the Batmobile at an angle to resemble the hood.
If your cake is starting to get soft, pop it back into the freezer. ANY time your cake gets soft or starts to crumble (or the frosting starts to smear) it needs to go back into the freezer. Refreeze any usable cake scraps too, if you aren’t finished sculpting.
You need a large freezer to do this with anything big. I usually have to rearrange our deep freeze before getting started so there’s enough flat space for my cake tray.
Make it 3 Dimensional
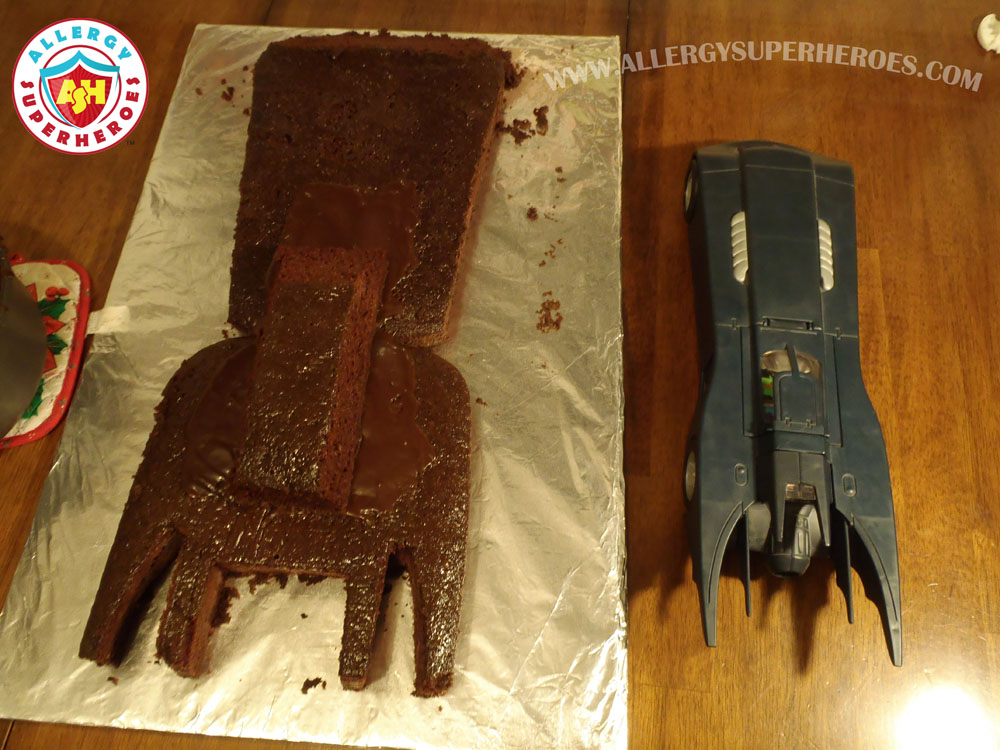
Next, you’ll need some frosting and the pieces for your second layer. In this case, I needed to add the driver’s cab. Using what was left of my second cake, I cut a thin strip and shaved off the front end at about a 45 degree angle, about the same as the toy I was trying to match. Use frosting to attach the two layers together and carefully place the second layer. Frosting hardens quickly when places on frozen cake, so you’ll need to act swiftly to get your top layer secured.
The Crumb Coat – the most important layer
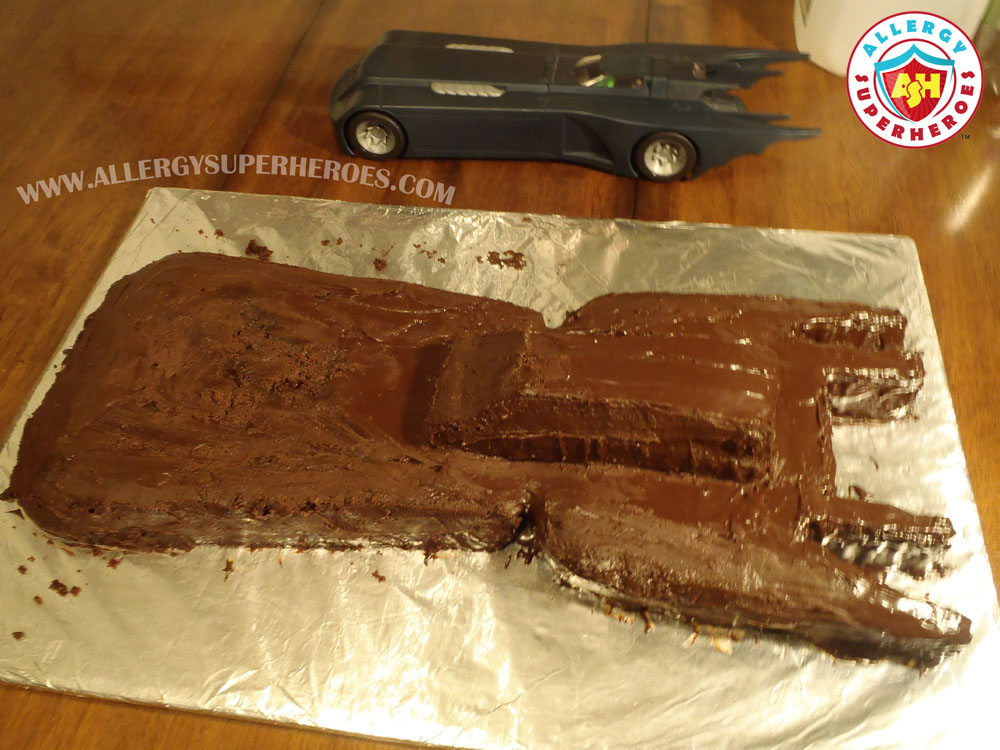
Then, you want to apply a crumb coat. This coat of frosting will look ugly, but that’s okay because nobody is ever going to see it. Using the spreader of your choice (I like to use a small rubber spatula) place a layer of frosting over the entire cake. Some crumbs will get caught up in this layer, but that’s okay–that’s why it’s called a crumb coat. This locks the cake into a better shape for your prettier frosting to go on top of. You will need to use gobs of frosting to fill in any gaps where cake pieces meet.
For the Batmobile, I used my Chocolate Buttercream Frosting. This recipe works well with Earth Balance, but I used real butter since nobody in attendance had a dairy allergy. Note that the crumb coat doesn’t even need to be the same color frosting as your final coat. However it’s good to have similar shades so nothing bleeds through.
Even though you should expect crumbs, beware. As soon as you start to get large crumbs or big pieces breaking off, it’s time to put the cake back in the freezer. With all the details at the back of this Batmobile, it took me three tries to finish the crumb coat. Once you’re finished with the crumb coat, put the cake back in the freezer.
Any time I’m waiting for my cake to refreeze, I make more frosting or do dishes. Basically, I take care of tasks that I’d have to do anyway while waiting for the cake.
On to artistic Cake Decorating
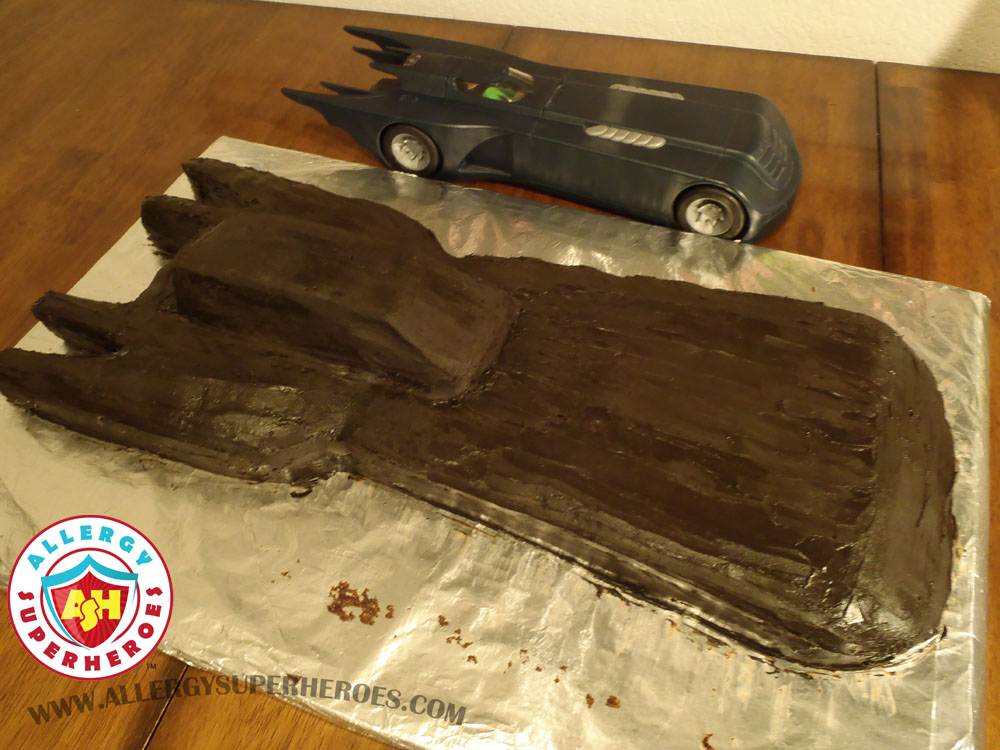
After your crumb coat, you’ll want to apply your real frosting. I made a second batch of Chocolate Buttercream frosting for this, and then added black food coloring. If you’re doing a multi-color cake, only add the permanent colors where they’re needed. If your crumb coat starts to come loose or mixes with your top coat, put the cake back in the freezer. Put it back any time you’re taking a break, too.
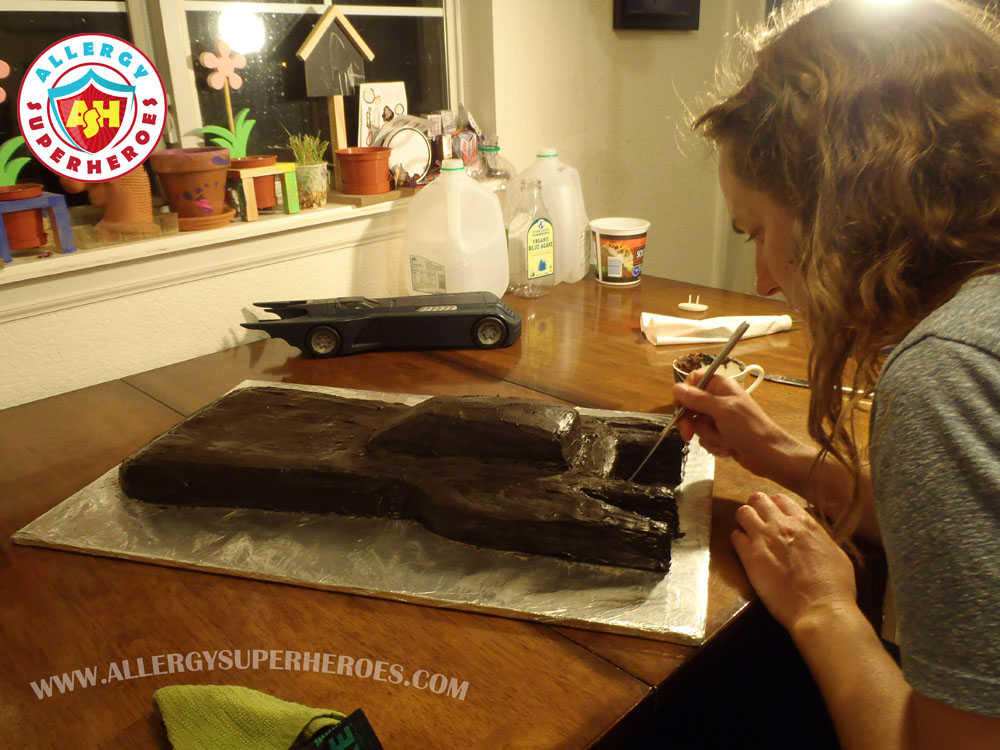
Next, clean up the edges. Your cake will have a crisper appearance if you wipe away the globs of frosting that fell onto your tray while decorating. I carefully slide a dish cloth along the perimeter of the cake to get a straight line. Then I’ll use a knife or smaller tool clean up hard-to-reach places. Hubby caught me here gettimg extra frosting out of the crevices at the back.
Now add Details!
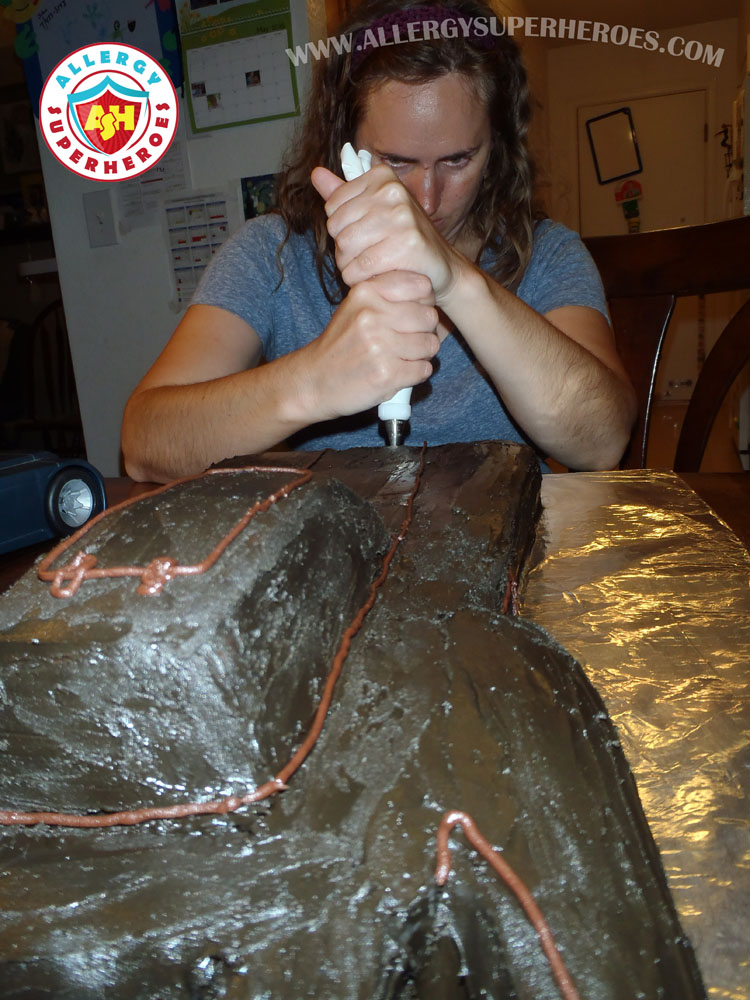
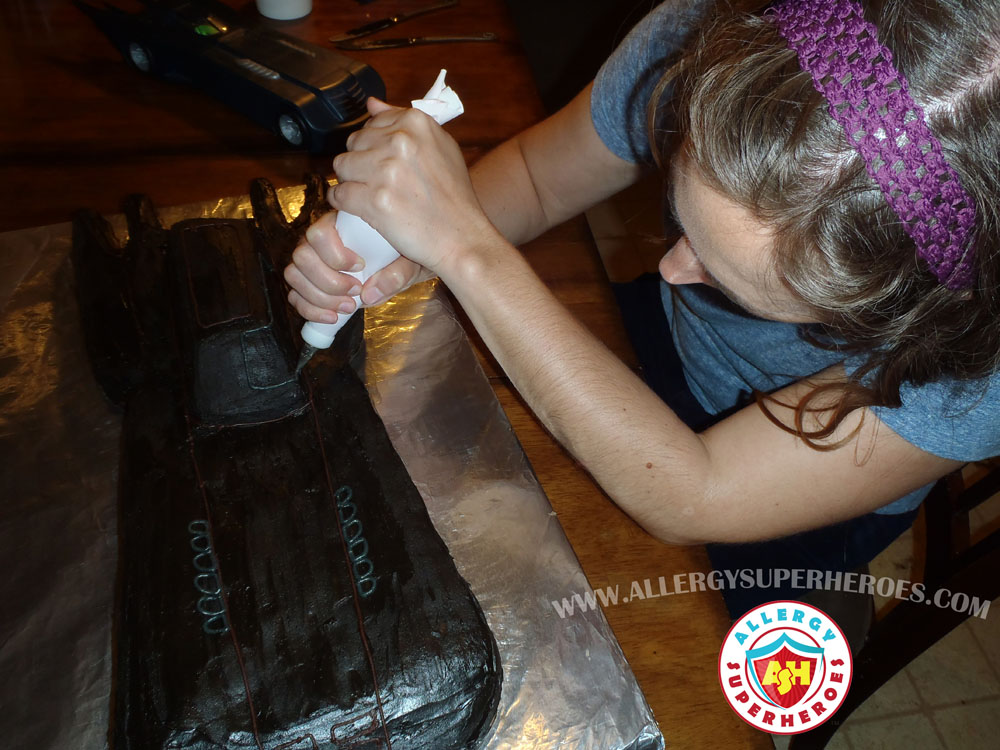
I piped three different types of frosting onto the Batmobile for details. First, I used leftover plain chocolate for contours and lines on the car. I used this for doors, ridges, and the front grill–I just looked at the toy next to me and approximated where they needed to go. I used a pastry bag with a small circular tip for each color (don’t even know the details of the tip–sorry.)
Next, I made a quarter batch of my Cream Cheese Frosting and separated it into two bowls. The first I tinted yellow, and the second I tinted gray. (The gray came out blacker than I’d intended, too much food coloring). I used the gray to outline and fill in the windshield and also to outline the engine exhaust thingies on the hood. Then I carefully drew the bat from the Bat Symbol on the center of the hood. This wasn’t on our toy, but I wanted to have it somewhere, and it wasn’t going to work on the doors.
I used yellow to pipe headlights and to make an oval around the Bat Symbol. Finally, I used more gray to outline and complete the Bat Symbol.
Remember that any time your frosting starts to smear, put it back–you guessed it–in the freezer. My chocolate frosting gets harder so I didn’t have to do this much for the Batmobile. However, on cakes I’ve frosted with Cream Cheese Frosting, I’ve had to freeze them several times to keep a firm work surface.
Lastly, I used gray frosting to attach Oreo cookies for wheels, and used more gray to make hubcaps. I used leftover frosting to write a Happy Birthday message on the tray in front of the car.
Keep it pretty until ready to serve
Once you’re finished decorating, your cake should wait for your party in the freezer, or at least the fridge. This will prevent sagging or bleeding of colors before the party. I take mine out at the beginning of the party so people can see it, and so it can thaw.
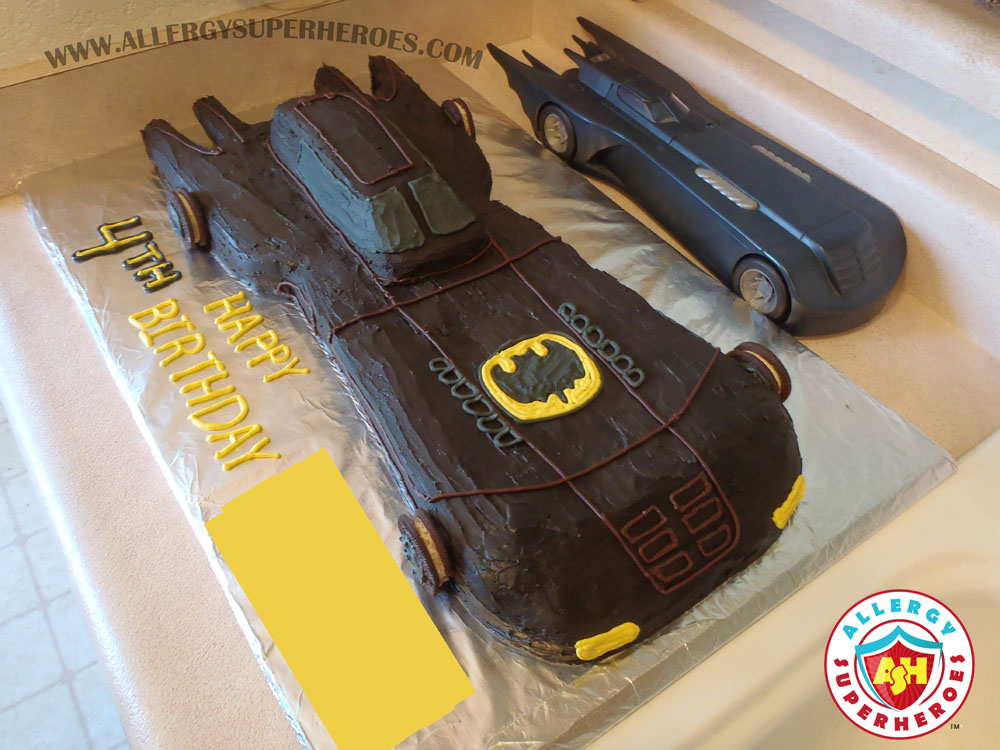
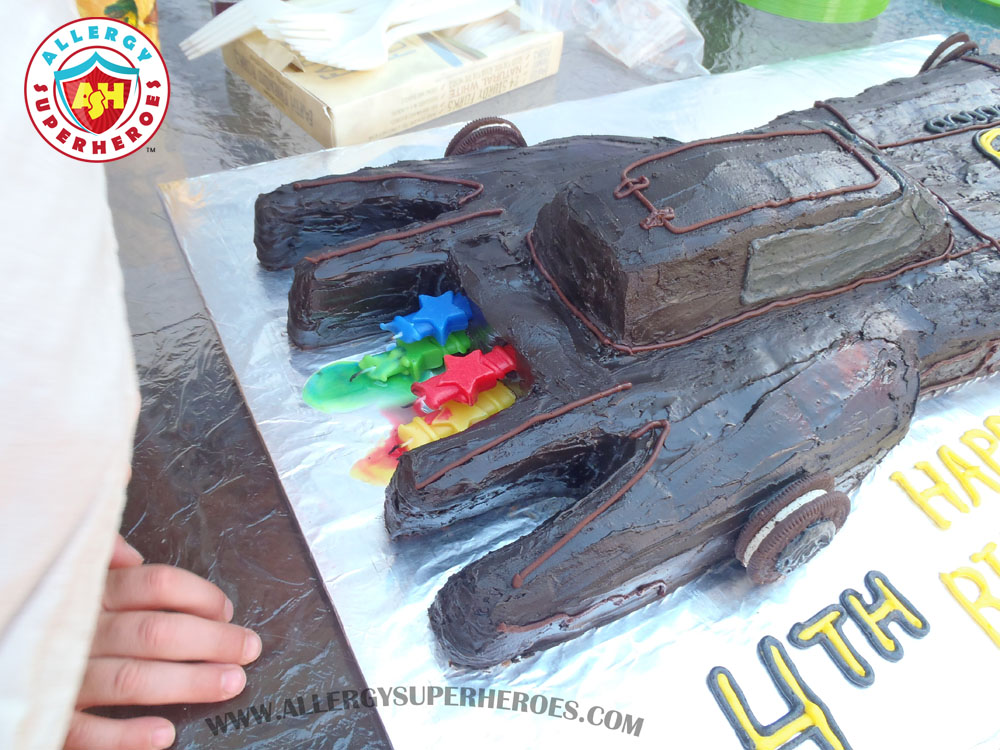
As a final touch, we stuck the candles in the back of the Batmobile to be the jet engine.
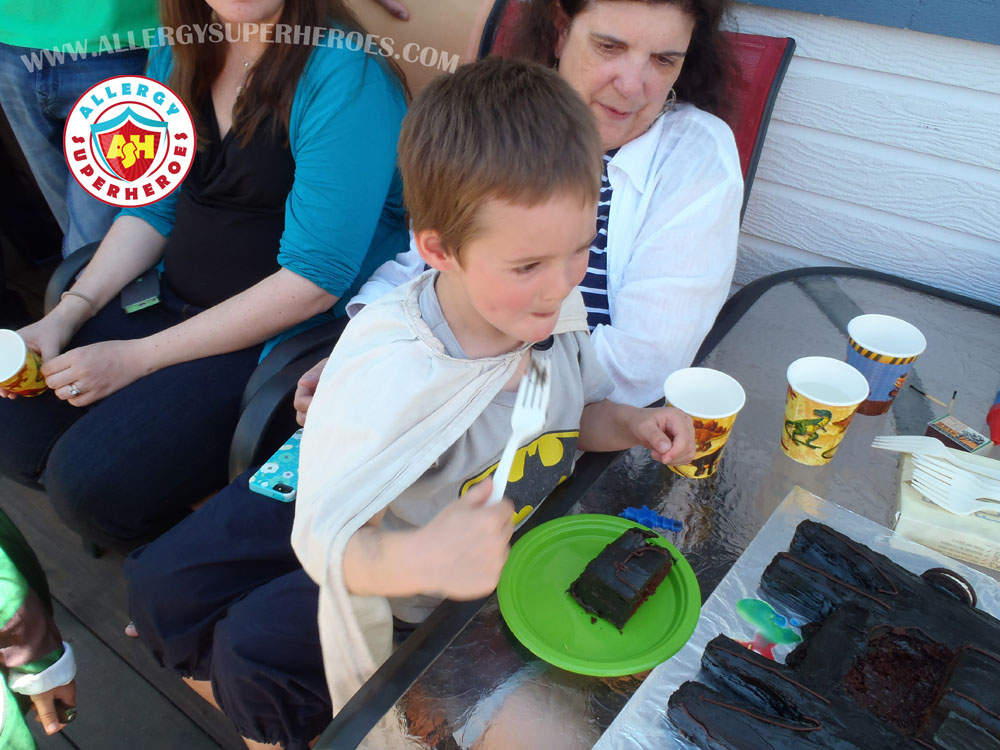
To say that Kal (and his brother Zax) were excited about this cake is an understatement. I think it’s so cool to see their faces light up when they see one of these creations! It makes getting only four hours of sleep before the party worthwhile!
You can use this cake decorating tutorial with any sort of cake, even if nobody has any allergies. Our cakes are allergy-friendly, but nobody can tell. My sons’ cakes are different from other kids’ cakes. But even though they’re aware of their allergies, the only difference they really notice is that their own cakes are darn cool!
Linking up at Allergy Free Wednesdays, Gluten Free Fridays, and Corn-free Everyday
What sort of allergy-friendly birthday cakes have you made? Please share! And if you’re worried about your allergic child at birthday parties, note that Allergy Superheroes is now open! We’ve got super Superhero products to help remind the party host and other adults that your child has dietary restrictions, while keeping it cool! www.allergysuperheroes.com


Holy Batman!!!! This is awesome! I just have to figure out how to do a natural black food colouring dye-we have some allergies over here too! Great job!
Thanks! Even if you can only manage gray it could be a retro-Batman look. Or gray added to chocolate frosting might make it black enough. Good luck! Please share pics if you make one!
Way to go Mama! Amazing work. Your family will have incredible memories to share for years to come. But, the real question is how do you top Batman next year? Good work! I'll going to enjoy checking back to see what the future brings to your kichen.
All the contents you mentioned in post is too good and can be very useful. I will keep it in mind, thanks for sharing the information keep updating, looking forward for more posts. Thanks
pastry Glendale
This comment has been removed by the author.